

Bad North: Jotunn Edition guide
Bad North: Jotunn Edition can be cruel. You never quite know where your next attack is going to come from, and--even if you’re prepared for it--things might just not go your way.
This doesn't mean the game is random, but it does have a peculiar imprecision to it that you definitely have to get used to. If you find yourself struggling to make adjustments so you can finish a run successfully in this game, keep these tips in mind.
Turn on level restarts
Whenever you begin a new run in Bad North, you have the option to tick a box that says “Allow Level Restarts.” Particularly when you’re new at the game, having this option on is crucial. Not only does it make it a bit easier to recover from strategic gaffes, but it also is a valuable teaching tool. By replaying scenarios with the same units on the same island against the same enemies, you can learn first-hand how certain tactical adjustments can change the outcome of skirmishes and battles.
So don’t worry about feeling cheap by reloading levels. Use it as a teaching tool. Then, if you’re so inclined, you can turn it off to really test your skills. Without using it though, you’d have to play a lot more runs and observe a lot of failures to learn how and why things are going wrong.
Don’t just defend houses, defend the shores
Every battle in Bad North has the promise of granting you gold to upgrade your units, provided the houses on the island aren’t destroyed. To make it to the end of the game, it’s crucial to earn as much money as possible as you go, but that doesn’t mean you should just try to position your troops around houses to defend them.
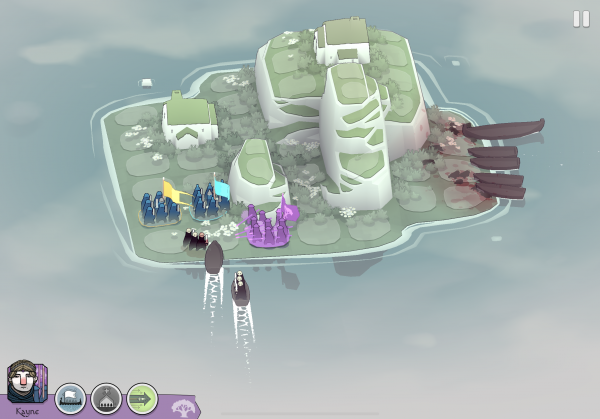
In fact, it’s much easier to try and use your units to defend the entire island. Enemies that are already on foot are unpredictable. They can move anywhere they want. As they arrive by boat, though, you can surround them and even control where they’ll have to move to defend themselves. Another important thing to note about fighting on the shore is that you can actually push enemies back into the water, and doing so instantly kills them.
Play in near-constant slow motion
Whenever you start to issue a command in Bad North, the action slows down to a crawl. Use this to your advantage. Select units, even if you don’t want to move them, just so you can watch the action play out slowly and read and react to new developments.
The danger in doing this, of course, is that you might have to issue a command which will then speed things up, perhaps when you don’t want to. To avoid this, there is a trick to get back into the slowed down action almost instantly. As it turns out, you can select destinations for units to enter slow motion as well. This means that if you tell a unit to move somewhere by double-tapping, you’ll issue the command to move on the first tap, but the second on selects that destination you highlighted, which again slows the action. With a little practice, you can use this technique to play out full battles, almost completely in slo-mo.
Focus on spearmen, then infantry, then archers
There are three basic unit types in Bad North, and they are all important in different situations. That said though, there is a definite order in their importance that naturally occurs across runs. This has a lot to do with the way that the game ramps up difficulty and mixes enemy types, some of which are weaker or stronger against certain units.
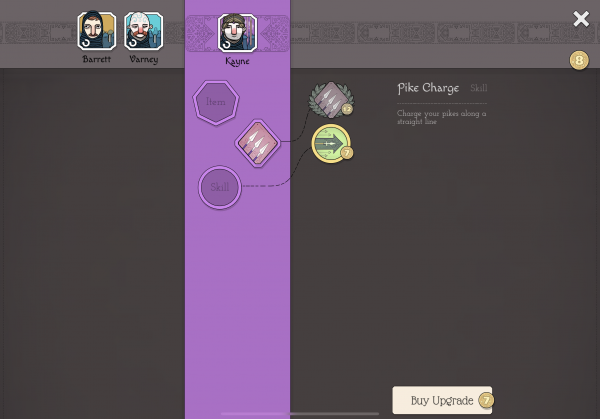
Without getting too in the weeds about which units are best for what, just know that spearmen should be prioritized immediately, followed by infantry, and then archers. Toward the late game, you should probably have powerful versions of each of these units in your regular troop rotation, but spearmen are perhaps the most consistently powerful unit thanks to their pike charge ability, which you can use to push enemies into the sea to instantly kill them. From there, infantry are the most flexible/durable, and then archers are key for taking down enemies as they get more numerous.
The simple ambush is your friend
A lot of Bad North consists of watching and waiting for enemies to come to you, but this doesn’t have to be how all of your combat encounters go. In fact, there are certain units in the game that can really exploit being left to their own devices to decimate your forces. This is why you should set ambushes and overwhelm enemies with well-timed charges from protected locations.
This is to say that you should look to position your forces around choke points or behind cliffs to make sure they can’t be flanked or hit with projectiles as enemies approach, and then just move your infantry right into enemy lines, with spearmen backing them up at their rear and archers shooting down from the high ground. This quick move to strike seems to disorient a lot of Bad North’s enemies, plus it makes sure you don’t leave your troops exposed until they are in full combat with enemy forces.