148 Apps on Facebook 148 Apps on Twitter

Tag: Strategy guide »

Dungeon Gems- Tips, Tricks, and Strategies for Fighting Elements with the Elements

Posted by Jordan Minor on July 17th, 2014
+ Universal App - Designed for iPhone and iPad
Our rating: starstarstarblankstarblankstar :: :: Read Review »

Thought evil dragons were just a myth? Well they’re back in Dungeon Gems. And even though the game will seem quite familiar to fans of Puzzles & Dragons, it still has intricacies of its own to master. So gather an elite team of elemental heroes to take down the monsters one dungeon at a time. Here’s how.


Fight Fire with Fire, or Water, or Wood…


  • Basic attacks are launched by matching elemental gems like a puzzle game. You don’t even need to match three, just one will suffice. However, longer combos create more powerful attacks. Some even create special gems that clear a single element from the board, including new ones that cycle in to replace the old, doling out a massive assault.

  • Each element has different strengths and weaknesses. Fire beats wood but is weak against water while light and dark both beat each other. Be sure to target enemies by touching them so attacks can have the most impact.

  • Some enemies have longer waiting periods between turns. Check the number next to them and use any extra turns you may have to deal more damage or heal yourself by linking heart gems.

  • Defeating enemies grants you action points. These can be used to activate special skills or link separate elements together for huge, multi-elemental attacks.

  • Civilization Revolution 2 - Tips, Tricks, Cheats, and Strategies to Help You Conquer the World

    Posted by Blake Grundman on July 9th, 2014
    + Universal App - Designed for iPhone and iPad
    Our rating: starstarstarhalfstarblankstar :: MORE REDUX THAN REVOLUTION :: Read Review »

    Now that the sequel to the widely lauded Civilization Revolution is finally upon us, it seems high time to fill you all in on the best ways to lay siege to the world for a second time. But as any diehard Civilization fan already knows, the long and winding road to victory can be fraught with countless twists and turns. Hopefully, if you take a few of these hints to heart, you might be able to alleviate a few of those first devastating defeats.

    Research Unlocks All Doors


    No matter what the objective in the specific scenario being played, research will eventually be the key to success. Here are a trio of key research concepts to keep in mind as the battle progresses:

    • In many cases, the other civilizations on the map are slow to expand outward. Take advantage of that time to pour extra gathering units into pulling in as many research points as possible early on. You will reap the benefits as the eras advance.

    • Though the game does tout its ability to shift gears throughout the research trees, it is still best to put focus one specific area, with specific end goals in sight. Only after exhausting one avenue of advancement in an era is it really beneficial to branch out into other paths.

    • There are great late-game payouts for each research tree, so make sure to check out the flowchart and find the payouts that will best compliment your playstyle.

    The Evolving Role of Cities


    As mentioned before, early on it is best to pour the most resources into research. But as time progresses and more cities are added to the empire, the roles of each province should change.

    • When more settlements are added to the empire, don’t be afraid to move the production of battle or defensive units out towards the borders. Unless roads link the entire empire, transporting units towards the front lines become far more cumbersome than necessary.

    • It is best to use the more internally located cities as resource mines for pulling in additional research points. The benefits of these advancements can then flow outward, further powering expansion

    • As cities expand away from the capitol, don’t be afraid to change the production role of a city to better match its geographical location on the map. Try to think about what resources in the area are most beneficial to the whole of the country and if the location should be more focused on offense, or defending the core of the empire

    • Don’t feel the need to establish settlements as soon as settlers become available. There is nothing wrong with idling these units until a more suitable location is found. Under most circumstances, patience will lead to far more beneficial locations becoming available from either a resource gathering or tactical sense.

    Tactics Evolved


    Despite the game offering up to four different ways to win a match (cultural, economic, conquest, or scientific) it will be pretty much impossible to win without some form of moderate combat. When heading into battle, it may be best to keep the following things in mind:

    • Get rid of warriors as soon as possible. They are quasi-useful early on when grouped into armies of 3 units, but their effectiveness wanes quickly.

    • Evolve unit production along with technology. Don’t be afraid to move away from tried and true unit types you rode heavily (in the case of cavalry units, quite literally) early on in the campaign. All of the enemies will be doing the same, so don’t be the one bringing a catapult to a tank battle.

    • Don’t be afraid to sacrifice a unit or two if you don’t have any scouts available. There is nothing wrong with sending one of the worthless warriors you have hanging around to the slaughter if it means you will be able to get a read on the level of your opposition. Sometimes it is better to lose a level one troop instead of a mid-level army that could be more effectively used elsewhere. After all, warriors are much cheaper and quicker to produce than the disposable spy units.

    • Don’t forget to cover your back. Any city that doesn’t have at least one troop stationed within its borders is ripe for the conquering. This is essential to not lose sight of when in the throes of rapid expansion. An unprotected city is essentially like leaving the front door unlocked for anyone to walk in and claim for themselves.

    • As empires become less centralized, consider using roads as a way to 'hotlink' provinces for quickly transferring resources and troops. In the long run it can make the difference between victory and defeat.

    Above all else, Civilization Revolution 2 will consistently provide a different experience for every single match. Don’t chain yourself to one specific play style, and you will ultimately be able to harvest far more hours of enjoyment than those intent on pigeonholing themselves into a gameplay corner. So get out there and explore; there's plenty more to learn and enjoy!

    Monster Hunter Freedom Unite - Tips, Tricks, Cheats, and Strategies for New Hunters

    Posted by Rob Rich on July 3rd, 2014
    + Universal App - Designed for iPhone and iPad
    Our rating: starstarstarstarhalfstar :: YOO HALLOO :: Read Review »

    Monster Hunter Freedom Unite is a surprisingly intricate game - well, surprising if you’re unfamiliar with the series, anyway - and as such there’s no shame in getting a little help. Which is exactly why we’re here! We’ve put together a handy guide for hunters who are just starting out, full of all sorts of useful knowledge that will hopefully keep you all alive out there.

    So suit up, grab your gear, and get ready to lay the smack down on to very large critters!

    So You Want to be a Hunter?

    The first step to getting anywhere in Monster Hunter is figuring out what type of weapon (or weapons) will work for you. There are quite a lot to choose from - 11, in fact - and each one is different. The best way to try them all out is at the Training School.

    - In order to access the Training School you’ll need to first speak to the village chief (the elderly woman by the fire). To find her, just head up/North from your home. Once that’s finished you can find the Training School on the opposite side of the Guild Hall.
    - Select the Beginner School, read through the basic Hunter Info, then you’ll be able to select Weapon Usage.
    - Weapon Usage will allow you to try out every single category of weapon in the game. You’ll be given a temporary set of equipment, and an item box full of handy items at the start. The weapons you use are decent, and the tasks are simple - just enough to give you a sense of how the weapon functions.
    - The distinctions between each of the 11 weapon classes are too numerous to go into in a beginner’s guide, but an important thing to remember is that there are two main groups: Melee and Ranged. Both groups utilize completely different types of armor, so make sure to keep that in mind when crafting new gear.

    Boom Beach - Tips, Tricks, Cheats, and Strategies on How to be the Biggest and Baddest

    Posted by Jennifer Allen on July 2nd, 2014
    + Universal App - Designed for iPhone and iPad
    Our rating: starstarstarhalfstarblankstar :: CLASH OF TANKS :: Read Review »

    New to Boom Beach and in need of a helping hand? We've got you covered. While a lot of the fun of such games is figuring out your own strategies for success, it's also useful to have someone give you a few helpful tips and tricks to get you started. We offer up a few pieces of advice for those just starting out and confused as to where to go or what to do next.


    The Importance of Being Resourceful

  • As with most freemium-based city or base building games, the resources you gather are vital to getting anywhere in Boom Beach. Early on, you'll mainly be dealing with wood and gold. Wood is used for building new things as well as upgrading existing structures. Gold is primarily used to recruit new units and reveal more of the map, thereby opening up more opportunities to progress.

  • As well as that is the premium currency: diamonds. These can be used to fill up the gaps left behind by lack of wood or gold, but they're much more efficiently used to speed up timers on things that have long waiting times. Early on, few things take long to build so save any diamonds acquired (when possible) for later on in the game when things can take days to finish. Completing achievement objectives unlocks more diamonds, so focus on these where possible.

  • Later on in the game stone and iron will play valuable roles in upgrading buildings, but by then you should have a handle on what's going on.

  • Unusually, in the early levels gold is quite plentiful while wood is much harder to come by. A useful tip is to remove as many trees as possible. It'll cost 600 gold a turn but you'll gain 300 wood in exchange, thereby making it much simpler to afford those all-important building upgrades.

  • A Beginner's Guide to Angry Birds Epic - Tips, Tricks, and Pig-Walloping Strategies

    Posted by Jennifer Allen on June 24th, 2014
    + Universal App - Designed for iPhone and iPad
    Our rating: starstarstarblankstarblankstar :: SIMPLE RPGING :: Read Review »

    In some cases, Angry Birds Epic is going to be many players' first encounter with a turn-based RPG. While it might not be the deepest of experiences to old-hands at the genre, we felt it was the perfect time to provide you with some helpful hints to start you off, as you work towards wiping out the evil pigs yet again.


    Basic Battle Strategies


    Regular RPG players will tell you that there are a few core principles that apply no matter what game you're playing. Angry Birds Epic is no different in that respect.

  • Knowing your enemy is always key in these kind of instances. Angry Birds Epic makes it simple with holding a finger to each pig - enabling you to see what abilities they possess, so you know exactly what to expect.

  • There's no penalty for exiting to the map at this point so you can easily do that to change birds or hats (special abilities), so that you're at your strongest for each fight. Remember: different classes work better in different situations!

  • Generally, you should always focus on healer pigs or ones that can resurrect other downed pigs. There's no point inflicting plenty of damage on other enemies if the healer can undo your good work with one spell!

  • Some pigs are immune to certain statuses, so consider that before you make your move. A pig that can resist poison? Well, don't bother trying to poison it then! It's a simple idea, but one that can easily be forgotten about in the heat of battle.

  • There's nothing to be gained from weakening multiple pigs at once, so always focus on one pig at a time. Ideally, and assuming there aren't healing pigs to pick on, you should go for the weaker and smaller prey first before taking out the big brutes.

  • After you've built up a sufficient number of attacks, you can use a rage chilli to perform a special attack that relates to that character's abilities. Use it up whenever possible. They don't carry over between battles so there's no point letting it go to waste! The only exception here is when dealing with wave battles as it's better to save the chilli for the start of a new wave. They replenish frequently so you can often use a couple during a series of battles.

  • Unlike in other RPGs, using a health potion doesn't take up a turn. It's a small yet significant thing to consider, given it can make all the difference in battle.

  • Struggling to defeat a particularly tricky foe? Watch the videos that Rovio keep offering. These give you a 20% increase in health and attack power. They're limited in number so try to save them for a special occasion. They can really make all the difference.

  • Always have a healer in your party. Attacking like crazy is all well and good, but it's pointless if you get wiped out too soon. Healing helps. A lot.


    General tips

  • Equipment is key throughout Angry Birds Epic. It's simple enough to craft from pieces gained during battle, but there are some useful ways to make it all the better.

  • Replay missions often for more items and loot that can then be used elsewhere. Plus, aim for those magical three-star victories. These are based upon how much health you have at the end of a battle so heal up just before the end for the maximum chance of three stars.

  • Check the scavenge points every day for new loot to be acquired. It can be pretty profitable.

  • Similarly, daily dungeons unlock after a certain point and these are invaluable.

  • Get friends involved as they can enable you to re-roll when crafting equipment. Re-rolling dictates whether you get the fabled 3 star piece of equipment or a weaker 2 star one.

  • Save up for a Golden Anvil. It's not cheap, needing Lucky Coins to buy one, but keep leveling up and play naturally for a week or two and this should be possible. A Golden Anvil means better gear, which makes all the difference in battle.

  • FTL: Faster Than Light - Basic Tips, Tricks, and Strategies for Inevitably Doomed Captains

    Posted by Rob Rich on May 5th, 2014
    iPad App - Designed for iPad
    Our rating: starstarstarstarhalfstar :: PREPARE FOR JUMP :: Read Review »

    If there’s one thing you need to know about FTL, it’s that it’s a fantastic game. A very close second thing you really need to know is that it’s about as unforgiving as that one extremely tough grade-school teacher that never gave anyone a break. Don’t play innocent, we’ve all had one.

    So, while we here at 148Apps wholeheartedly endorse you rushing to the App Store to purchase FTL for your iPad immediately (seriously, go do it if you haven’t already), we also understand that you may have some trouble starting out. Or just in general. That’s why we’ve put together a list of tips, tricks, and strategies to hopefully keep your ship and your crew functioning that much longer. Due to the random nature of sector layouts, encounters, and shop inventories there’s no way to guarantee success, but we’re certainly going to do our best for you.

    XCOM: Enemy Unknown (and Enemy Within) - Tips, Tricks, Strategies, and Cheats For Beginner Commanders

    Posted by Rob Rich on November 17th, 2013

    Update: 11/13/2014
    Since they're technically the same game, I've added tips for Enemy Within to our pre-existing guide for Enemy Unknown. All of the Enemy Within tips can be found towards the bottom of each category, and are denoted with a bullet point. You can also check out our Enemy Within review right here.

    The X-Com series, particularly the earlier games, are notoriously unforgiving. Although while XCOM: Enemy Unknown has been modernized, and is therefore more player friendly, it’s no slouch either. In fact, even on the Normal difficulty there’s a good chance you’re going to get creamed if you try to breeze through it. But all is not lost. If you find that you’re losing soldiers at an alarming rate or keep getting the project disbanded because a bunch of countries freak out and leave, we've got a few tips you might want to consider.

    Planning Tips

    Facilities are essential. Your manufacturing and research abilities, as well as your satellites, all require the proper facilities to operate. Completing a terror mission to earn five engineers could be a waste if you don’t have enough workshop space to use them. And that could lead to falling perilously behind in the early game arms race.

    Research, research, research. Don't neglect your scientists! The technologies they can uncover after studying alien corpses and weaponry are essential to giving your soldiers a fighting chance. By the same token, don't be afraid to take aliens alive. Assuming you can do so with relative safety. It allows you to recover their weapons intact, which can then be equipped on your soldiers or sold for a tidy profit.

    Don't ignore the Council. You might prefer to spend your money and resources on better armor and weapons, but if you don't get a few satellites in orbit and ignore the Council's requests you stand to lose immense amounts of funding. Plus you can flat out lose if too many countries abandon the project.

    Check your stores often. Sometimes you'll acquire items you don't need for research or manufacturing, and these can be sold off in bulk for a decent price. The same goes for alien tech and specimens you've fully researched. So long as it isn't Ellerium or alien alloys there's a good chance you won't need it for the long haul.

    Build smart. Most facilities belong to one of a few different categories, such as energy production or satellite use. Whenever two facilities belonging to the same category are next to each other either horizontally or vertically (i.e. uplink next to an uplink, etc) they both get a bonus. This is a very good thing.

    Pay attention to your upgrades. You won’t necessarily have the chance to develop all of them, but many of the projects you can produce at the Forge (once it’s available) can make a huge difference.

    Consider holding off on major tasks. Despite all the open-endedness Enemy Unknown’s story does progress linearly. Every so often an urgent mission or task will appear, and once it’s completed the next phase of the story begins. While the alien forces will get more and more difficult to deal with over time, regardless of where you are in the story, there are benefits to keeping the plot in check. Namely it gives you the opportunity to research better equipment and gather more resources before the endgame.

  • Don't rush to build a Cybernetics Lab or a Genetics Lab right away. I know it'll be tempting to try out all those shiny new toys as soon as possible, but it will take you a while to collect enough Meld (the new alien substance you'll use to enhance your soldiers) for either one to be useful. You're better off focusing on keeping your squads well-equipped at the start - you can always build either (or both) structures later.

  • Both cybernetic and genetic augmentations take time, so plan accordingly. No matter if you're turning your soldiers into hulking death machines or enabling them to leap several stories into the air, you'll need to wait a few days - in addition to the upfront money and Meld costs, of course. You'll want to pace yourself so you don't end up with half (or more) of your best soldiers stuck in surgery or whatever when the aliens start a new terror campaign.

  • MECs don't use equipment. If you do ever turn a soldier into a MEC trooper, know that they won't be able to use any of their old equipment. If you plan to augment one or two of your soldiers and they happen to be using nice armor or weapons, you can pass them along to the others and save a few million bucks on production costs.


    Soldier Tips

    Pay close attention to soldiers' skills. Plan accordingly. Try to select skills that compliment each other, such as the heavy's Holo-Targeting (accuracy bonus to all squad members when firing on an enemy) and the sniper's Squad Sight (can target any enemy that other soldiers see, no matter the distance, so long as there's a clear path to the target).

    Consider having two or more of each elite class. It can take some effort but will be worth it. It enables you to create various soldiers with skills that are ideal for a variety of situations; such as a sniper that specializes in large, outdoor environments or an assault soldier ideal for cramped locations.

    Upgrade the barracks. Don’t forget about the Officer Training School. Many of the upgrades you can acquire can be a huge help throughout the game; especially the ones that increase the squad size. Check in every so often as more options become available as your soldiers gain higher ranks.

    Don't ignore the support class. Having a medic on the team can mean the difference between a favorite soldier spending a few days in the infirmary or getting their own epitaph. Plus their smoke grenades can really help out in a pinch.

    Sidearms can be your best friend. Pistols may not seem all that great at first, but they can mean the difference between life and death; especially plasma pistols. Make sure to give your most powerful handguns to your snipers as they can’t move and fire their rifle in the same turn unless they learn a specific perk. Otherwise, if you intend to move them at all, make sure they have rockin’ pistols. And make the effort to manufacture the pistol upgrades when you can, too. I’ve had my snipers take down enemies from quite a distance during their reaction shots using only a pistol on several occasions.

    You wanna live? Get a S.H.I.V. The S.H.I.V. is a small robotic vehicle, not unlike a human-sized tank. They’re no replacement for a battle-hardened soldier but with enough research and development they can be quite devastating. Plus they’re the perfect expendable solution to filling an injured soldier’s spot on the squad during a mission.

    Use the right armor. You might think it’s clever to put every single soldier in your squad into the most durable armor you can find, but it’s more likely to hinder them. For example, snipers shouldn’t be on the front lines, and therefore could benefit a lot more from armors that may not be super-tough but can help them reach the high ground easier.

  • Award medals to your soldiers as soon as you get them. Medals another of the new additions in Enemy Within, and you can use them to give your favorite soldiers a slight boost to various skills or attributes. Each medal can be assigned one of two permanent buffs (in other words, once you pick a medal's effect you won't be able to change it), so you'll also want to think about what will be best for the long haul rather than what might be handy in the moment.

  • No matter how cool it sounds, don't turn everybody into cyber soldiers. Sure MEC troopers are a force to be reckoned with, but they aren't as adaptable as regular or genetically modified soldiers. One or two MECs will probably be enough. And MEC suits are interchangeable, so even if you lose a cybernetic soldier you can still pass their rig onto someone else.

  • Autopsies lead to more modifications. As with the rest of your technology, the more types of aliens you autopsy the more gene and cyber mods you unlock. If you want to really dig into either of these new sub classes, make sure you don't dawdle when it comes to cutting those bodies open.

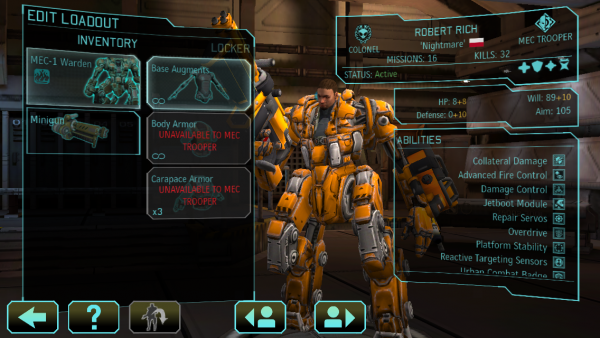
  • The Foundry can be a MEC trooper's best friend. In addition to a few new projects that benefit regular soldiers (such as giving everyone the ability to carry two items), there are quite a few that are specifically tailored for MEC troops. Things like improved armor durability and movement. Make sure you check these projects out if you're serious about cybernetics.

  • Converted MEC troopers keep their ranks. This is important because, just like regular soldiers, higher ranks means more skills. If you convert a high-ranking soldier into a MEC trooper, you'll be able to access the same number of skills from the MEC skill tree. It gives you a bit of a head-start, as it were.

  • Both cyber and gene mods are irreversible. The game makes sure to tell you this, but it bears repeating: once you modify a soldier, you cannot go back. On a similar note, MEC troopers can never be genetically modified or vise-versa.


    Combat Tips

    Cars can, and will, explode. It seems obvious but I can't stress the importance of keeping an eye out for burning vehicles enough. Cars and trucks do provide decent cover, but once they catch fire it's only a matter of time until they blow. And you don't want your soldiers near them when that happens. So take a moment to see if the vehicle you plan to move to, or are currently hiding behind, is a ticking time bomb before you make a move.

    Don't take unnecessary risks. It's often better to miss out on alien tech than to lose a skilled soldier. Take it slow and don't spread out too much. If a soldier encounters an alien squad and no one can reach them within a turn or two, they could be in serious trouble. Splitting up into groups of two or three is usually the best way to go. At least until your soldiers reach the higher ranks.

    Head for the high ground. Everyone, soldiers and aliens alike, benefits from a higher elevation. The higher up you are, the better your accuracy and the worse your enemy’s is. It’s not worth taking unnecessary risks to get to the top of a building or anything like that, but if you have the chance to take a higher vantage point then do it.

    Never, ever, ever, ever, blindly rush in to a room. It doesn't matter if it's a UFO, base, regular mission, or terror site. It's a sure-fire way to get vaporized. Approach with caution instead. Get at least two soldiers into good positions, preferably with one next to a door or window, and go into Overwatch. Then carefully open the door or peek in on your next turn.

    Approach all newly encountered alien species with extreme caution. At least until you know what they're capable of, and especially if you’re new to X-Com. What looks like a pushover could quite possibly decimate your entire squad if given enough of an opportunity. Just assume every new life form you encounter is the most dangerous creature you’re ever going to face and you should be all right.

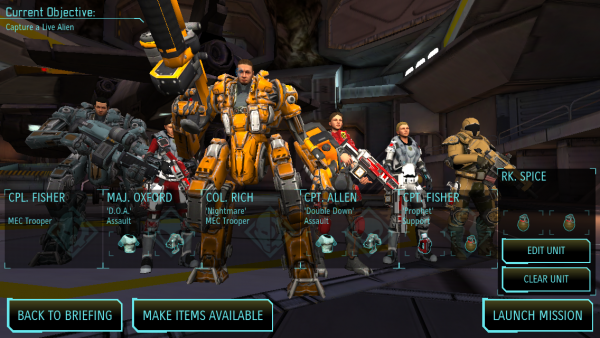
    Take ‘em alive. It’s not always feasible, or worth the risk, but when you can you should try to capture an alien or two alive. Not only can their interrogation lead to new research opportunities, you’ll be able to recover their weapons intact which could save you a fortune in engineering costs.

    Push forward at the beginning of your turn, not the end. When you move ahead into unknown territory you always run the risk of encountering a squad of aliens. Believe me, it’s much better to discover them after only moving one or two soldiers than all of them. It leaves the entire squad incredibly vulnerable, especially in the later levels.

    Keep Chryssalids as far away as possible at all times. You’ll typically see these spider-like aliens during terror missions but they can (and will) appear elsewhere. KEEP YOUR DISTANCE. Trust me.

    Surprise attacks are possible. While the aliens are definitely at an advantage most of the time, they aren’t omnipotent. Use this to lure them into a trap on occasion. If your soldiers can’t see them, they can’t see your soldiers, so it’s possible to set a few up in key locations and use one of your own as a decoy to draw them into range.

    Don’t underestimate Sectoids. Sectoids are the most “normal” of Enemy Unknown’s, and possibly the most common. However, while they aren’t particularly durable they can use their telepathic abilities to strengthen their comrades. However, if you kill a Sectoid while its mind is merged with another alien both will die. Keep that in mind.

  • Pick augmentations that suit a soldier's class. Most of the genetic modifications you can research are useful in a variety of situations, but some are far more tailored to certain types of solders than others. For example, giving your sniper the ability to jump super-high will make it much easier for them to reach the high ground in a hurry. The modification that prevents poison and strangling is also great for snipers as they tend to hang back in combat, which leaves them susceptible to the new Seeker enemies (think robotic flying stealth squids). Similarly, it's most beneficial to give your scouts (typically Assault or Support classes) mods that allow them to 'sense' enemies that are still hidden.

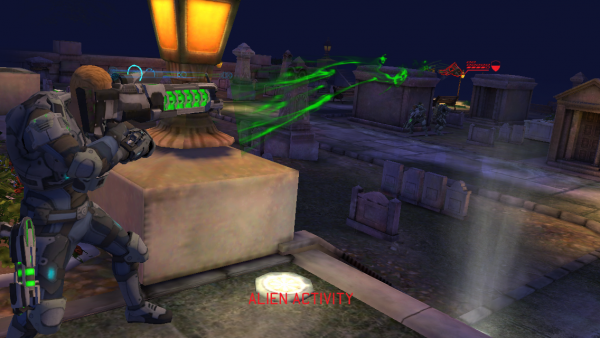
  • MEC troopers are not invincible. Oh sure they're more durable than regular soldiers but they're also bigger targets and they can't use cover. Until you've got a high-ranking soldier using a second or third tier MEC suit, you'll want to avoid using them as walking, talking shields.

  • Try to use two MEC troopers, one with each kind of secondary weapon. The flamethrower can be monstrously effective against Chryssalids, especially when they group up, but it has a very limited number of uses during a mission and the lack of range makes it a poor choice against targets with guns. Foundry upgrades can make it more formidable, though. Conversely, the pneumatic fist (I don't care what it's actually called, that's what I've dubbed it) has absolutely no range. However, it can one-shot most small enemies and may even knock them several feet through a wall. It can also be a very effective (and cool looking) way to finish off larger enemies like Berserkers and the new Mechtoid.

  • Play around with new types of equipment when you can. Enemy Within also sports a number of new secondary items for your soldiers to carry into battle such as grenades that can stun your enemies temporarily and special ammo that deals significant amounts of damage but isn't useful over long distances. There's no reason you shouldn't try most (or all) of these new toys out - especially once all of your soldiers can carry two items apiece.

  • Do NOT investigate the fishing village. Trust me.


    The Most Important Thing

    Be prepared to lose. A lot. Newcomers, especially. XCom is a fair game, but it's also fairly unforgiving. A few wrong decisions early on could create a ripple effect that totally undermines your progress later (see previous tips about selling gear and tending to the Council). Depending on the difficulty and options selected you could also lose a beloved soldier in a flash thanks to one silly mistake. Avoiding these situations is incredibly difficult, but learning from them doesn't have to be.


    If you’ve got your own tips and strategies you’d like to recommend feel free to chime in below. With the odds stacked so firmly against us, We'll need whatever help we can get.

  • Plants vs. Zombies 2 Pro-Tips: Free-to-Play or Free Forever?

    Posted by Blake Grundman on August 23rd, 2013

    There is a dirty little secret that some are too busy worrying about Plants vs. Zombies 2’s microtransactions to acknowledge: It can be played for free, FOREVER. In the final installment of our pro-tips series we will discuss exactly how to do so. Penny pinching has never been so simple.

    Free-to-Play or Free Forever?

    Yes, there are certainly more than a few opportunities to shell out real cash monies to the talented folks at PopCap Games. It could even be argued that a few of the purchase exclusive items might be of benefit to the player; but they are far from critical. In fact, later on in the base campaign these seeds could prove to be weaker than the core suite of spores unlocked through the game’s natural progression.

    Another major complaint is the fact that players must spend earned in-game currency in order to utilize one-time-use power-ups, much like the ones we discussed yesterday. The fact of the matter is that while the currency can be refilled using actual dollars, it's just as easy to replay/grind early stages again in order to earn cash. Could this be considered tedious? Probably. But if it were easy, why would anyone ever trade real cash for “funny money?”

    Unlocking worlds utilizes a similar concept of iterating on a stage several times, only with a different gameplay wrinkle for each session. These stars are then used to turn around and unlock new worlds. The base set of worlds were easy to reveal, as long as the player has enough patience to play through stages a couple of times. Honestly, what fan of the series wouldn’t be doing this already? Each world had a low enough bar of entry that the minimal star counts were trivial at worst. Hopefully PopCap will continue with that trend in whatever additional content that awaits players in the pipeline.

    At the end of the day PopCap may have made their game almost too devoid of the necessity to spend money. Plants vs. Zombies 2 may not be a free will offering, but with the way it's designed it might as well be. For this reason it is worth imploring players to actually consider buying an item or two, all in the name of supporting a developer that consistently gives fans more game for next to nothing in return. Remember, just because you can always play for free doesn’t necessarily make it the right thing to do. With great replayability comes a great responsibility.

    So for the last time, never forget that there is no shame in having a green thumb if keeps the blood off of your hands! Thanks for a fantastic week and please continue to return to 148Apps for all of mobile gaming needs.

    Plants vs. Zombies 2 Pro-Tips: Power to the Plants

    Posted by Blake Grundman on August 22nd, 2013

    Pull up a chair and listen to the tale of a Plants vs. Zombies 2 round gone horribly awry. Not only can this happen to anybody, but there is little that can be done once the cogs of fate have started rolling against the player. Unless, of course, there are a few power-ups left in the satchel. Then all bets are off.

    Power to the Plants

    There comes a time in every player’s game when they decide whether to pack it in and take a loss or dig deep and try for a miracle win. For the non-wussies in the population there are power-ups, which help to level the playing field - for a cost. These specific perks take four different forms and can vary in levels of usefulness.

    As far as generic pay-per-use perks go, there are three different ways to dispatch undead using gestural controls: pinching, flicking, or sliding. The one thousand coin lightning bolt is used by sliding a finger between zombie adversaries, which links them in a chain of electric obliteration. A throw costs a bit more, clocking in at twelve hundred, and consists of a flick of the finger that will send the troops reeling. Arguably the most viscerally appealing is the pinch, which simply pops the head off of every reanimated abomination and oddly happens to be the cheapest at only eight hundred coppers.

    The last, and easily most useful of the quintet of amplifications, would be the overcharge leaf. This game-changer allows any one plant to cause an absurdly augmented amount of destruction. Every plant is effected by this item differently, but the result is always the same: tons of re-dead corpses. While these normally cost a thousand apiece to unlock, frequently they can be collected off of dispatched plants.

    But when are these items right to use? Most times they should be saved for the last or middle wave of zombies, unless the fate of a mower is in question. If a match can be won using less than three perks, then it's normally worth it. The reason for this is that between two to three uneventful stages, these losses can be recouped without necessitating the spending of a penny of actual cash.

    Most critical of the decisions is which power-up will be most effective for a given scenario. As far as bang for the buck goes, the pinch is the most effective in clearing a map while not draining the bank. If undead are bunched together, a couple of double flicks can go a long way towards cleaning house. Heavily armored brutes are best to be left for the electric bolt. They may not end up completely drained by the end of the attack, but all of the weaker enemies in the area will be singed beyond repair, leaving all the defenses with a single target.

    It may seem like a no-brainer to purchase as many overcharge leafs as possible, but they're abundant enough through death drops that it should almost never need to be done. This power will be the one that is used the most abundantly, but should also be reserved for worst case scenarios. Juicing up a Bloomerang may be the very best use in early worlds, simply due to its combined horizontal and vertical attack, but be sure to experiment with each plant when the stakes are lower.

    Be sure to keep it locked here for tomorrow’s final lesson: How to play Plants vs. Zombies 2 forever, without spending a dime. Rest assured, it is not to be missed. So until next time, remember that there is no shame in having a green thumb if keeps the blood off of your hands!

    Plants vs. Zombies 2 Pro-Tips: Déjà Vu All Over Again

    Posted by Blake Grundman on August 21st, 2013

    Another day, another sweet dose of high fructose Plants vs. Zombies 2 tippage. In today’s lesson, the goal is to make stage replays as painless as possible. So sit back and relax while we let the knowledge flow.

    Déjà Vu All Over Again

    Once a stage has been cleared as part of the main campaign, players have only seen the proverbial tip of the iceberg when it comes to what it has to offer. In order to clear whole worlds, they'll need to re-visit any given area as many as three more times, all in the name of grinding out stars.

    One type of mission that's used heavily early on is the limitation of how many plants can be in used at one time. Thankfully there are seeds that are destructible! Be sure to make heavy use of the potato bombs, and this will help keep the plant count down while still maintaining a high level of protection. Additionally, it is also extremely useful to combine cocoanuts, placed as far to the right of the map as possible, with an evolved Peashooter or Bloomerang behind it. The nut will eventually be gnawed through, but not before heavy damage has been unloaded on the troops barricaded behind it.

    Another pesky permutation are the “non-trample” assignments, where a line of moss will exist somewhere on the map and the player’s job is to prevent the hallowed ground from being decimated by undead feet. Once again, the cocoanut is the player’s best friend when laid two rows in front of the “no-step zone.” Behind the roadblock, plant some Bonk Chow. This will help deliver a strong one-two punch, as the strikes can hammer away on any zombie feasting on a nut. Thankfully this method will also allow for quick plant replacement should the brain munchers manage to breach the perimeter.

    Probably the most irritating of all the challenges involves use of a sun power cap and plant limit, simultaneously. Right out of the gate the key should be using as few sunflowers as possible to race to the power cap, while making use of the low cost bombs as a cheap form of early defense. Once the sun cap has been reached destroy all of the sunflowers, because they are no longer useful and take away from the plants available for productive use. Next is to focus on collections of Bonk Choy, backed by Bloomerangs. This combination will help to pick away at the defense long before the troops ever reach the front lines. Bonks are more than up to the task of cleaning up the riff-raff.

    Also, don’t be afraid to make use of a power-up in a pinch. The trick is to pick the correct time to deploy these special abilities. Tune in tomorrow to see just what scenarios best necessitate paying for a little help from the deities of the greenhouse. Until then, remember that there is no shame in having a green thumb if keeps blood off of your hands!

    Plants vs. Zombies 2 Pro-Tips: Seed Selecting Secrets

    Posted by Blake Grundman on August 20th, 2013

    A new week is finally upon us, which can only mean one thing: a fresh new dose of Plants vs. Zombies 2 pro-tips. So without further ado, it is time to ring the bell and start class. Everyone, please take your seats.

    Seed Selecting Secrets

    As players venture deeper into the fertile soils of Plants vs. Zombies 2, it becomes immediately evident that there are WAY too many different seed varieties! Unfortunately, there is also a fairly limited number of active seed slots available per round. This makes the selection of the proper plant varieties absolutely critical. Here are some helpful hints to fend off even the hungriest of zombies.

    The main factor to consider are a stage’s hindrances. If this is the first time through a stage, most likely the player will only be dealing with varying waves of outbreak management. For this scenario, be sure to refer to last week’s hint for successfully starting a match. To utilize this strategy, add at least a standard sunflower and pea-shooter (or their upgraded states which are unlocked later), along with a land mine. Additionally, a strong hand-to-hand plant like Bonk Choy will be more than enough to make a significant dent on the front lines, while the pea-shooters chip away at the horde from a distance.

    If a stage has obstacles in the way, this is where stratagems become a bit more subjective. In the case of tombstones that appear in a region like Egypt or their numerous facsimiles in other worlds, it is critical to choose between either avoiding the objects altogether or blowing them to kingdom come. Most times, the latter of these options will prove to be more effective. In this circumstance the Bloomerang is by far the player’s best friend. Not only will it chew through multiple obstacles at one time thanks to its multiple projectiles, but also debilitate enemies as well. Nesting these seeds in between a back row of sunflowers and the melee focused Bonk Choys will help ensure their survival and as well as a steady flow of graves being demolished.

    Last and certainly not least, NEVER underestimate the value of delay tactics. Having a cocoanut in the arsenal is an extremely effective way to bide time, especially when there is not enough sunshine in the bank to produce a more powerful offensive unit. It may not be the most glamorous slot in the utility belt, but there are times when its quick deploy time and thick skin can genuinely make a difference when an unprotected lawn mower is in the balance.

    Now get out there and start making smart lineup decisions! Tune in again tomorrow when we talk about conquering stages for stars and how to tackle their assorted nightmarish objectives. And as always, remember, there is no shame in having a green thumb if keeps blood off of your hands!

    Plants vs. Zombies 2 Pro-Tips: Sowing the Seeds of Success

    Posted by Blake Grundman on August 15th, 2013
    + Universal App - Designed for iPhone and iPad
    Our rating: starstarstarstarhalfstar :: FANTASTIC FREEMIUM FUN :: Read Review »

    On the heels of Plants vs. Zombies 2’s release for iOS, we decided it might be fun to pass along a few tips and tricks we've learned over the last month; starting with some helpful strategies for setting up a solid foundation. Keep an eye out all next week for even more zombie-stopping strategies!

    Start With Sun and Spuds


    Anyone worth their salt knows that nothing happens in the conflict between zombie and zucchini without the assistance of plenty of sunlight. This is why it is key to make planting sunflowers the early emphasis of almost every match. But that's a no-brainer, right? What might not be so obvious is how easy it can be to get an entire row of sun production in the ground before ever needing to plant a single pea shooter.

    But what about the zombies bent on munching the marigolds? It turns out that the lowly land mine, which is available from the start, can prove to be crucial in tackling the issue while simultaneously helping a player lay the groundwork for victory.

    At the start of every match begin by planting sunflower seeds across the entire back row as quickly as possible. On most maps, by the time the second plant has sprouted the first zombie will begin meandering down the aisle. Carefully note the location of the creature and plant a land mine in that row, the third column from the rear.  The standard walkers that start nearly every match will take long enough to saunter that the entire back row of sunflowers should be able to be seeded before the first brain-chomper goes boom.

    Follow suit for the second critter that appears, making sure to observer the same buffer of two squares from the back. This buys time that can be used to either plant an entire second row of sunflowers (my personal preference) or layout the first layers of protection. After the first two to three undead, this will have allowed for a free chance to stockpile energy or shore up defenses for whatever onslaught the hoard has in store. Fortunately this setup will work in almost every scenario and can help set the stage for a swift conquest.

    Be sure to let us know in the comments if you have any Plants vs. Zombies 2 topics you would like to hear about. We will be taking requests all next week. And remember, there is no shame in having a green thumb if keeps blood off of your hands!

    The Official Companion Guide to Doodle Jump – iPad edition Is Here!

    Posted by Rob LeFebvre on July 31st, 2013
    iPad App - Designed for iPad

    Pocket Gamer Guides are like those console game strategy guides that fill up many a gamer's bookshelves, chock full of background information, concept art, and tactics help.

    The Official Companion Guide to Doodle Jump – iPad edition is the latest in a long line of Pocket Gamer Guides, and it promises to have just that:

    Everything you need to know about Doodle Jump’s story so far – from its origin, to a difficult start, to global domination

    • An in-depth interview with the world’s best Doodle Jumper, including expert tips and exclusive footage of his 24 million highscore run
    • Get to know the tactics that will make you a master Doodler (24 million highscore not guaranteed)
    • Did you know there’s a nine-foot tall version of Doodle Jump? If it’s Doodle Jump-related, we’ve covered it
    • Complete breakdown of the themed versions of the game – what, when, and how to improve at them
    • And more fun stuff, including exclusive content to come in future updates

    Augment Your Strategy: 12 Stealthy Secrets For Deus Ex: The Fall

    Posted by Rob Rich on July 17th, 2013

    Despite the apparent opulence of Deus Ex: The Fall’s world, it’s still a very dangerous place. Whether you fight back against your aggressors or sneak past them without any bloodshed is a matter of preference, but one way or another these threats will have to be dealt with. It’s the very reason we’ve put together this handy guide that includes suggestions for weapons, attachments, augmentations, and general tips that should help Ben Saxon live to get caught up in a web of corporate intrigue another day.

    General Exploration and Hacking

    There are lots and lots of worthwhile goodies to be found just laying around the environment, but you won’t be able to reach all of it without a little help. Oftentimes there will be a couple of different options available for getting inside of a locked room, but without the proper augmentations certain areas will be off-limits for the entire game. That’s why you may want to think about teaching Ben a few of these skills if you’re interested in scrounging every last inch of the world for gear.

    Strength - Move Heavy Objects is a handy skill to have both for exploring and circumventing enemies. It boils down to shoving large boxes out of the way but it often reveals hidden access points or opens up new paths. Punch Through Walls can also be quite handy, even from a non-combat standpoint. With it Ben can essentially create his own doorways through specific points of the environment, although punching through solid concrete makes a fair bit of noise so exercise caution when using it.

    Hacking - If you want to find all the hidden goodies, you’re going to need to get used to hacking. Aside from the general Capture skills that allow Ben to hack more and more advanced systems with each upgrade, he can also make use of Hacking Stealth to make him less noticeable when capturing nodes as well as Fortify to strengthen captured nodes and make a trace more difficult.

    Combat Augmentation and Weapon Specializations

    We can’t always avoid confrontation, and when that happens in Deus Ex: The Fall it can quickly turn into a kill or be killed situation. Thankfully Ben has more than a fair amount of combat experience, so by focusing on certain firearms and augs he’ll be more than capable of holding his own when things get dicey.

    Armor - If you plan to get into a lot of firefights, you’ll definitely want to take points in armor. Not only will it increase Ben’s toughness but after a couple of upgrades he can also learn EMP Shielding, which will nullify the effects of EMP blast from grenades and mines as well as render him immune to electrified flooring.

    Strength - Punch Through Walls is great for exploring, but it’s also handy for fighting. With the proper timing Ben can easily dispatch an enemy that would otherwise be difficult to sneak past simply by reaching through the wall they’re standing by. Recoil Compensation and Aim Stabilization are also important since there’s bound to be a lot of shooting (especially once he blasts a hole in a wall with his fist) and accuracy will be very important.

    Weapons - With the exception of the Stun Gun, all the firearms are lethal. The Crossbow can silently take out unarmored enemies with enough damage upgrades while the 10MM Pistol and Combat Rifle can also be fitted with sound suppressors in order to take out targets from a distance without making too much noise. If subtlety isn’t an option (or desired) there’s also the Q Tap attachment for the 10MM Pistol that adds armor piercing. Then there are all the non-so-subtle weapons like the Tactical RPG, Plasma Rifle, and Shotgun. Ben also has access to Frag Grenades and mines, both of which can be devastating if used against groups of enemies. EMP Grenades and Mines are also worth considering as they’re useful when dealing with mechanical enemies as well as augmented humans.

    Stealth Augmentation and Weapon Specializations

    Not everyone is looking to start a fight or kill hapless guards. In fact, it’s entirely possible to complete Deus Ex: The Fall’s first episode in its entirety without killing anybody. It requires a lot of sneaking around and some very particular skill choices, but it’s also incredibly satisfying to pull off.

    Cloaking System - Ben’s ability to cloak gives him a distinct advantage when it comes to sneaking past enemies. Its power usage is limited, but when used at the right moment it can make navigating a room full of guards a lot easier.

    Multiple Take-Down - Since ammo is somewhat limited and the Stun Gun is for close range, you’re going to have to get really familiar with non-lethal take-downs. Each one uses up one of Ben’s energy bars, however, so being able to take out two guards in close proximity at the same time (and on a single charge) just makes good economic sense.

    Radar System - Ben has access to the first stage of this aug right from the beginning, but upgrading it to improve its range will be very useful when it comes to planning a route through hostile territory. Although it can be tough to tell where each enemy is, exactly, since they’re only represented as little spots in an empty box.

    Smart Vision - Smart Vision makes up for the radar’s shortcomings by showing enemy locations and orientations in real time. It can be tough to tell which direction the little green arrows are facing on the radar, especially when playing on the smaller iPhone screen, so being able to see exactly where each enemy is in relation to Ben through solid objects is a major help.

    Energy Converter - Because so many of Ben’s essential stealth augs require energy to activate it’s important to sink some Praxis Points into this skill. Specifically the Energy Recharge Rates as the faster his batteries recharge the sooner he’ll be able to use more skills. Adding more bars through Energy Upgrades is handy, too, but it’s important to remember that Ben only naturally recharges a single bar by default. The rest have to be refilled using items. Of course with enough points in Energy Upgrades you can unlock a Recharge Capacity Upgrade which will allow Ben to refill two bars automatically.

    Cybernetic Leg Prosthesis - Ben’s legs have a few enhancements that can make sneaking around easier. Run Silently allows him to move at top speed without making noise and drawing attention, and it works in conjunction with his Movement Speed Enhancements so he can pretty much zip around without making a sound. Stealth Dash is also useful for closing the distance between cover points in a hurry without alerting every guard in the room.

    Weapons - Ben has a few less options when it comes to stealth-friendly weapons, but there are still more than enough tools to work with. The Crossbow is still a very viable option and can be fitted with tranquilizer darts for non-lethal sleep shots. The Stun Gun is also a handy option for saving on battery power but it’s close range only and doesn’t reload very fast. If you don’t have a problem with killing, both the 10MM Pistol and Combat Rifle can be fitted with a silencer for more quiet long-range options. Finally, Ben can make use of Concussion Grenades and mines to stun enemies while he makes an escape or beats them to a pulp.