148 Apps on Facebook 148 Apps on Twitter

Tag: Ringtones »

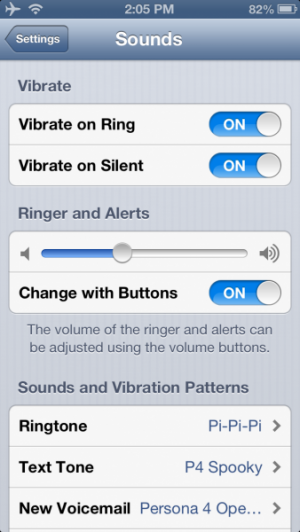
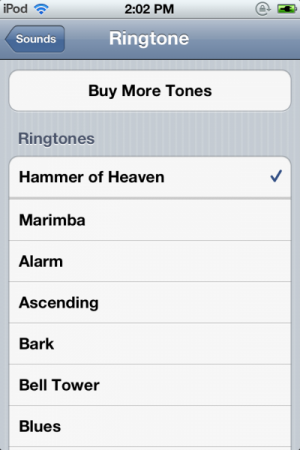
How To: Create A Custom iPhone Ring Tone Without iTunes

Posted by Rob Rich on January 31st, 2013

There are a lot of iPhone users out there who enjoy being able to personalize their ring tones, myself included. But sometimes that can be easier said than done, especially when users can’t sync to iTunes for whatever reason. However, there's a way around this issue that’s both easy and incredibly effective with a minimum of cost (about $6 total) and absolutely no jailbreaking involved!

First and foremonst, two apps need to be installed: ToneConvert and GarageBand. Be warned; GarageBand is a big install that takes up close to 700 MB.


Once both apps are installed and ready to go, the rest is easy. Open up ToneConvert and you’ll see this screen:

Select Browse for audio file. For the purposes of this example we’re going to be visiting www.audiko.net just like in the video. Mostly because it’s a fairly massive source for pre-sized audio files.

Now it’s time to select a sound or song. I’d prefer to search for something myself, so let's look for the Godzilla roar.

After picking the file, tap the Preview button. This will call up two choices: Play or Download. Hit Play first to make sure it’s the desired sound, then go ahead and Download it.

It’s time to Convert it!, then hit Copy to Pasteboard. And that’s the first half of the process.

With the sound file is saved, it’s time to open up GarageBand. When opening the app for the first time, you should see the Instruments screen. Scroll over to the right until reaching the Audio Recorder.

Tap the Tracks icon in the upper-left corner. It’s the one that looks like a few broken lines next to the arrow.

Now tap the empty track and select Paste. You can use GarageBand to further customize your ring tone but for the purposes of this demo we’re going to keep it simple and stick with the default sound.

Tap the arrow in the top-left corner and select My Songs in order to save the project.

From the My Songs screen tap Edit in the top-right portion of the screen, and select the new song. Tap the Sharing icon in the upper-left corner of the screen (it’s the one that looks like a box with an arrow sticking out of it).

Scroll down and select Share Song As “Ringtone”.

From the Export screen you can name the tone whatever you’d like, then hit Export to finish the job.

Now it’s simply a matter of going into the phone’s Settings and Sounds tab to adjust the ring tone settings. Tap on the particular sound you’d like to replace, which in this case is Ringtone, and select the new tone.

And you’re done! Now you can download, adjust, or otherwise create your own custom iPhone ring tones without the use of a computer, iTunes, or a jailbroken device. So, what ring tones are you planning on making for yourself?

How To: Make Custom iPhone, iPad, and iPod touch Ringtones

Posted by Carter Dotson on August 27th, 2012

Isn’t it funny how ringtones, short snippets of full songs, cost as much as the songs themselves? It sure is. There is a way to beat the system and use any song – or any piece of audio, really – as a ringtone on iOS, and it can be done using iTunes alone. Seriously.

To understand how this works, realize that a ringtone file on iOS is essentially just an AAC music file – the file format for the music downloaded from iTunes – with the extension changed from .m4a to .m4r. So creating custom ringtones is just about getting that perfect snippet of audio, and then getting iTunes to recognize it as a ringtone.

Step 1: Getting a perfect snippet of audio

While I said that this can be done using just iTunes, for users unafraid to find the files themselves and just cut the audio snippet in an audio editor like Audacity, that can be done as well. Just make sure to export the file as AAC. For those who use this method to get the audio, skip directly to step 2.

For those who just want to use iTunes, here’s how it goes. Note that while screenshots may be from OS X, these all work on Windows as well. First, find the song to make a ringtone out of. Listen for the part that you want as your ringtone, and note the beginning and end times of this section. Right-click on the song in iTunes and click Get info. Select the Options tab. Put in the start time and end time in the appropriate boxes, and click OK.

Now, go to the iTunes PreferencesGeneral, and select Import Settings. Set the import settings to AAC Encoder and iTunes Plus as seen in the screenshot at right. Click OK, then click OK again. Right-click on the song again, and click Create AAC Version. This creates a new file that should be listed right next to the original, that is the length you specified. Right-click the song and click View in Finder. Go back to iTunes and delete the file from your iTunes library, but choose Keep File.

Step 2: Getting iTunes to Recognize the Ringtone File

 Now, with the file that we’ve just created, we need to rename the file extension from .m4a to .m4r, the extension for iOS ringtones. You may need to enable viewing file extensions in Windows Explorer or in the Mac Finder. Once the file is a .m4r, just drag it in to iTunes’ sidebar in the Library section. If you sync tones automatically, the ringtone should show up on your next sync. If you manually manage media on your device, click Tones under Library on the sidebar, find the file you just added, and drag it to your device on the sidebar.

Now, check your ringtones in Settings -> Sounds -> Ringtone. Custom ringtones are on top of the list, and if you followed these steps correctly, your custom ringtone is in this list. Congratulations! Now you too can wake up every day like it’s the intro of CSI: Miami. Yyyyyyeeeeaaaahhhhhh!

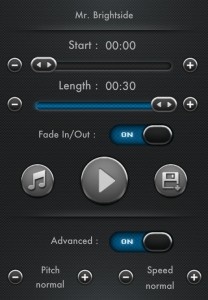
Make Your Own Ringtones on Your iPhone with Ringtone Remix Pro

Posted by Phillip Levin on April 25th, 2011
iPhone App - Designed for iPhone, compatible with iPad

Despite my love for my iPhone, I have to admit that one area it's kind of weak in is ringtone support. However, with Ringtone Remix Pro, the door is opened, and you're able to create whatever ringtone you like – and all from the convenience of your iPhone itself.

The app lets you take tracks from your iPod music collection and then convert them into a ringtone file, allowing you to use that file as either a ringtone or alarm clock sound effect. With the waveform editor, you can easily choose where your ringtone begins and ends or you can use the Magic Tone Maker feature to automatically select just the part of the track that has audio, ignoring any silent parts of the track.

Thankfully, the app goes for only a dollar on the iTunes App Store, so head on over and check it out now.

Ringtoner Review

iPhone App - Designed for iPhone, compatible with iPad
By Chris Kirby on November 11th, 2010
Our rating: starstarstarstarblankstar :: RINGS A BELL
It's still not easy to get a custom ringtone installed on your iPhone, but Ringtoner does manage to make the process more fun.
Read The Full Review »

AutoRingTone Pro Review

+ Universal App - Designed for iPhone and iPad
By Jennifer Allen on September 29th, 2010
Our rating: starstarstarstarblankstar :: CONVENIENT
AutoRingTone Pro is a useful tool if you want personalised ringtones
Read The Full Review »

RingToneMaker Pro Review

iPhone App - Designed for iPhone, compatible with iPad
By Jennifer Allen on September 22nd, 2010
Our rating: starstarstarhalfstarblankstar :: USEFUL
RingToneMaker Pro is a very simple tool to use. It might not be an app that you use very frequently but when you do, it comes in real handy.
Read The Full Review »