 PocketGamer.fun
  U.GG
U.GG  Icy Veins
  Arcade Cloud
  EV.IO
EV.IO How To: Make Custom iPhone, iPad, and iPod touch Ringtones
Beat the system and create custom ringtones using just iTunes with these handy tips.
Isn’t it funny how ringtones, short snippets of full songs, cost as much as the songs themselves? It sure is. There is a way to beat the system and use any song – or any piece of audio, really – as a ringtone on iOS, and it can be done using iTunes alone. Seriously.
To understand how this works, realize that a ringtone file on iOS is essentially just an AAC music file – the file format for the music downloaded from iTunes – with the extension changed from .m4a to .m4r. So creating custom ringtones is just about getting that perfect snippet of audio, and then getting iTunes to recognize it as a ringtone.
Step 1: Getting a perfect snippet of audioWhile I said that this can be done using just iTunes, for users unafraid to find the files themselves and just cut the audio snippet in an audio editor like Audacity, that can be done as well. Just make sure to export the file as AAC. For those who use this method to get the audio, skip directly to step 2.
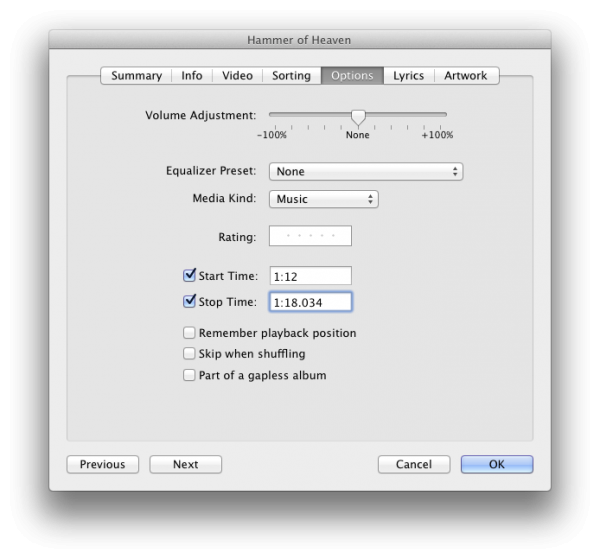
For those who just want to use iTunes, here’s how it goes. Note that while screenshots may be from OS X, these all work on Windows as well. First, find the song to make a ringtone out of. Listen for the part that you want as your ringtone, and note the beginning and end times of this section. Right-click on the song in iTunes and click Get info. Select the Options tab. Put in the start time and end time in the appropriate boxes, and click OK.
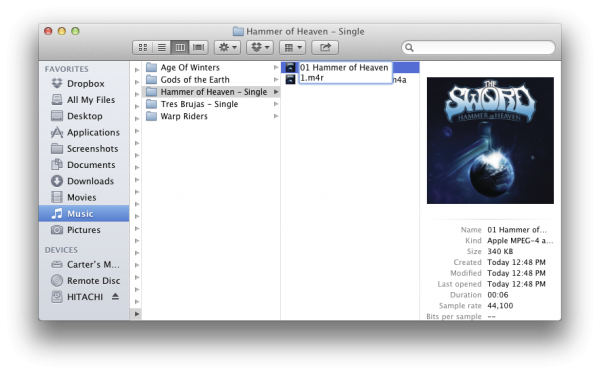
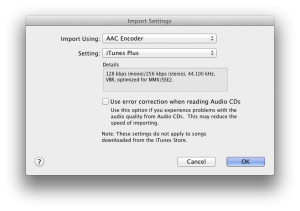 Now, go to the iTunes Preferences, General, and select Import Settings. Set the import settings to AAC Encoder and iTunes Plus as seen in the screenshot at right. Click OK, then click OK again. Right-click on the song again, and click Create AAC Version. This creates a new file that should be listed right next to the original, that is the length you specified. Right-click the song and click View in Finder. Go back to iTunes and delete the file from your iTunes library, but choose Keep File.
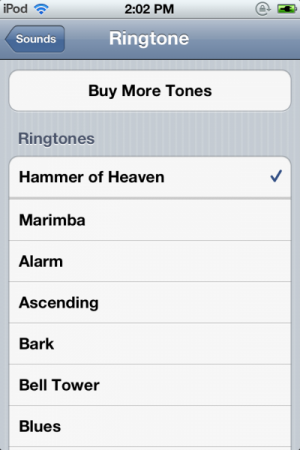
Now, check your ringtones in Settings -> Sounds -> Ringtone. Custom ringtones are on top of the list, and if you followed these steps correctly, your custom ringtone is in this list. Congratulations! Now you too can wake up every day like it’s the intro of CSI: Miami. Yyyyyyeeeeaaaahhhhhh!
