148 Apps on Facebook 148 Apps on Twitter

Tag: Restore »

How To: Prepare to Sell That Old iPhone

Posted by Carter Dotson on September 17th, 2012

It’s that most magical time of year: the time before a new iPhone launches. This means that for many people, it’s time to sell that old phone to buy the new one. For those looking to ditch their phone, here’s three handy tips to make sure everything goes smoothly in transitioning to the iPhone 5.

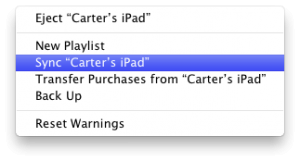
Make Sure the Phone is Backed Up

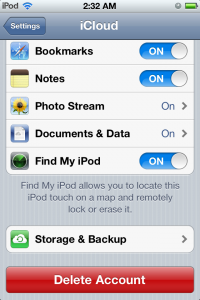
There’s no real need to start fresh with any missing contacts or apps when using a new iPhone. Follow our handy guide to setting up backups via iCloud or iTunes. Then, when the new iPhone is purchased, simply restore to the backup of that phone. On iTunes, this is just as simple as selecting the device from the list when choosing what to restore from. For iCloud backups, make sure to log in to the same iCloud account when restoring on the new device. It may be a good idea to note which iCloud account is being used on your old iPhone. Remember as well that backups are cross-compatible, so even an iPod touch backup could be used to restore to the new iPhone

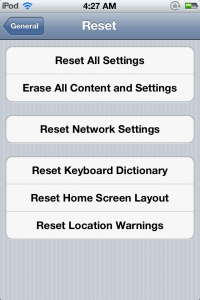
Make Sure the Phone is Erased.

No one wants to accidentally hand over a phone with all their contacts, saved payment information in apps, and their most embarassing photos to a stranger or even worse: a family member! Thankfully, erasing a device is easy. Just go to Settings -> General -> Reset and choose Erase All Content and Settings. This will erase all user data on the phone. Make sure it’s backed up first! This will leave it in a state where it will be possible to restore to a new device. If you’re selling it to someone you don’t know, you may want to set it up as a new device just so they can test the features out, while showing how to erase it so they can set it up themselves, possibly even from a backup they made!

Sell Securely

A website like Gazelle or a store like GameStop may make it easy to sell the phone quickly and securely, but this will not net as much as selling it directly to another person will. Selling via eBay or Craigslist is a good way to quickly sell the phone, but it comes with the inherent risk of dealing with strangers. Hold on to the original receipt if possible in order to ensure that you have proof that you purchased it in case someone tries to claim that the phone was stolen. Especially log your phone’s IMEI or ESN, a phone's unique identifying number, if possible, as it is what the carriers use to track stolen phones. Here's how to find this information on the iPhone itself. Having a log of this may help if a scammer tries to claim you sold them a stolen phone.

Good luck out there!

How To: Backup an iOS Device to iTunes or iCloud

Posted by Carter Dotson on June 11th, 2012

There are many reasons to back up an iOS device. Need to replace that iPhone? Backup and restore! Upgrading to a new iPad? Backup and restore! Sometimes an iOS device just acts weird with no way from the user end to fix them, and a full restore can help a device run in a much smoother manner. As well, the beauty of the restoration process is that a backup can be reinstalled on a completely different device, making upgrading to a new version of the iPhone or iPad easy. It makes upgrading to a new type of device, such as going from iPod touch to iPhone, and even to an iPad possible as well. But how does one go about doing this?

The iTunes backup process is fairly simple. While a backup is created after every device sync, individual full backups can be made by right clicking (or Command-clicking) on the device in the iTunes sidebar, and choosing Back Up. After the lengthy backup process, that backup with its date and time will appear in a list of backups when restoring from iTunes.

iOS 5 introduced iCloud backups and restoring, and these skip iTunes altogether. The advantage to iCloud backup is quite simply that it does not go through iTunes. There’s no weirdness involved with apps and media getting inadvertently deleted from a device unintentionally because iTunes decided to replace them. It’s much more painless when restoring, and handles downloads from multiple iTunes accounts much easier. As well, iCloud backups happen automatically overnight when charging, so if something bad happens, the restored device will not be far out of date.

The downside is that instead of installing from the computer, it downloads apps from the web, which can take up a long amount of time depending on connection speed and depending on how many apps one is restoring. I have too many apps installed (way more than 148) so I usually leave the process to finish overnight. Note that any media synced from a computer will have to be re-added through iTunes. As well, Apple servers tend to get hammered during new product launches, so early adopters may not enjoy a smooth experience. As well, those who take a lot of photographs and videos will find that the Camera Roll takes up a lot of iCloud space. It becomes a choice between either foregoing backing up the Camera Roll (as individual app backups can be disabled in the iCloud menu) or shelling out for more iCloud space.

iCloud backups must be enabled by selecting it as the backup method in iTunes. While the iCloud backup process is otherwise automatic, it can also be manually initiated by going to Settings -> iCloud -> Storage and Backup -> Back Up Now.

In order to reset a device to restore it as new from iCloud, go to Settings -> General -> Reset -> Erase All Content and Settings. This will set it up as if it was a brand new device. Enable iCloud while setting back up, choose to restore from iCloud, and choose the name of the device that was backing up to iCloud that you wish to restore from.

2.0.1 OS Update Results: Go for it

Posted by Jeff Scott on August 12th, 2008

We've been running the 2.0.1 OS update for a few days now and our advice is to go for it. Install the update only once you have a full and complete backup though.

We've had fairly good luck with the update -- even though we've just had our 4th restore, 2.0.1 seems a little faster if not more stable.

The install was quick and painless -- much quicker than the restore process (3+ hours in our case). Let us know your thoughts.

Careful With Those Apps Eugene

Posted by Jeff Scott on July 26th, 2008

So developers are blaming Apple, Apple isn't commenting, as they never do. But the deal is that for any iPhone OS 2.0 users there is a major stability issue that is causing data loss to watch out for.

Here's how it happens -- you are running an app and the screen goes blank and your iPhone or iPod Touch restarts.  You see the Apple logo and it looks like the device is restarting.  And the Apple logo doesn't go away.  And it still doesn't go away.  So, let's try restarting again-- hold down the power button for 8 seconds and it goes blank.  Start it again.  Same thing happens -- seems to be stuck in the boot up process.

I know that this has happened to at least 3 people on Twitter. Doesn't seem like it's an uncommon problem.

What do you do?  Well the only thing that seems to work is to force a restore from iTunes. For info on how to do that, see this Apple support article.  So after you give your phone the death grip and breathe a sigh of relief as the restore process starts you begin to wonder what happened?

I have a theory and it's just a theory.  I have no way to prove this.  But I think the crashes are being caused by lost memory.  Applications may not be properly cleaning up after themselves, known as releasing memory, when an application ends.  This lost memory is building up over time and causing the crashes as other applications can't get enough memory to work properly.

What you can do to keep this from happening.  Probably not much, it's mainly up Apple to fix what is causing this.  There are some things you can do that might mitigate the problem or help you recover when it does happen.

First, if an application crashes and you are returned to the application list, don't just go on with what you are doing.  It's a good idea to restart the phone to help it clean up lost memory.  To do this, hold down the power button for a few seconds and slide the shutdown slider.  Wait a couple seconds and hit the power button to boot back up.

What you can do the help recover if your phone does crash is let that agonizingly slow backup process in iTunes complete.  This will help so that you won't lose all your preferences (and your high score in Poker Dice!) when your phone needs to be restored.  It's time consuming, but hopefully not as time consuming as setting everything back up though.

So, about an hour later, hopefully your restore has worked completely and that includes the backup restore process. If the backup restore process doesn't work you will still luckily retain any synced contacts, calendar, etc.

To me this problem is just an indication that Apple has pushed out the 2.0 update a little early. They had deadlines and didn't make things as bullet proof as 1.x was.

All apologies to Pink Floyd for the title.

Pink Floyd - Careful With That Axe Eugene
[youtube r3R2PgMiTvw]