148 Apps on Facebook 148 Apps on Twitter

Tag: Howto »

Five Nights at Freddy's 3 - Tips, Tricks, and Strategies to Get You Through the Worst Week Ever

Posted by Rob Rich on March 13th, 2015

Hey-hey, glad you came back for another night!
Still trying to figure out if you really want to apply for the night shift at Fazbear's Fright? Then check out our Five Nights at Freddy’s 3 review!

One thing that all three games in the Five Nights at Freddy’s series have in common, aside from murderous animatronics, is that they each do things a little differently. Five Nights at Freddy’s 3 changes things up by paring it down to a single animatronic - only this one is a lot smarter, faster, and more dangerous.

Before we launch into the survival tips, please be aware that this guide will contain a few spoilers. The story elements and the mini-games won’t be discussed, but there are a few “events” that will be mentioned. So if you don’t want to ruin the surprise for yourself, don’t read past Night Guarding 101.


Night Guarding 101


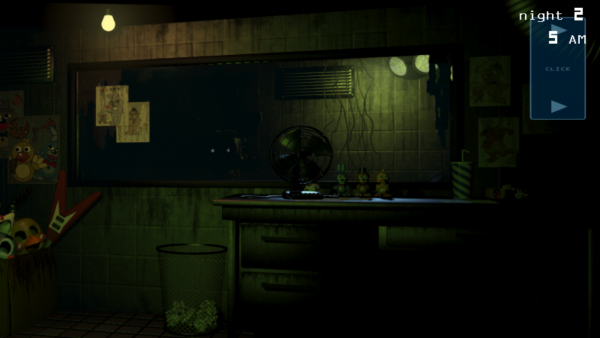
Welcome to the night shift! You’re gonna have a blast once this place opens. You get to keep an eye on the cameras to make sure nobody tries to walk out with a piece of Fazbear history, play creepy noises to spook the guests, and you’ll even be a part of the attraction! Here’s what you need to know for your first night.
  • The blue tab all the way to your right controls your CCTV monitor - Use this to keep an eye on the attraction. You can also Play Audio (more on that later), and use the Map Toggle button to watch the vents.
  • The orange tab to your left controls the attraction’s three main electrical systems - Audio Devices will prevent you from using the Play Audio button if they shut down, the Camera System will prevent you from being able to see if it breaks, and if the ventilation gets screwy you’ll start to have trouble breathing and might just start to hallucinate.
  • If more than one system crashes, use Reboot All - No matter how dicy things might get, it’s always faster to Reboot All rather than restart each system one after the other.
  • Playing audio clips is very important - Not only will the spooky child laughter creep out potential guests, it could also be used to guide them into different areas of the attraction.
  • Don’t sweat the first night - Your first night is an absolute breeze. Nothing could possibly go wrong, so take the time to familiarize yourself with the layout of Fazbear’s Fright and maybe try to get used to the time it takes to reboot the different computer systems.

Sid Meier's Starships - Tips, Tricks, and Strategies to Get Your Empire Off Terra Firma

Posted by Rob Rich on March 12th, 2015

Hailing frequencies open:
Trying to decide if this particular space empire expansions sim is worth your time? Check out our Sid Meier’s Starships review!

Sid Meier's Starships is a pretty great game in its own right, but it doesn't do a very good job of helping new players get acclimated to its systems - or its star systems (bah-dum-TSHHH). That's why we've taken it upon ourselves to cover some of the basics, a few of the things you won't learn about in-game unless you dig through the menus, and some strategies that will hopefully keep your fleet mobile and allow you to dominate the galaxy.


Getting Started


  • Keep it simple - For your first time out, don’t bother messing around with things like map size, difficulty, or victory conditions. There’s no shame in reducing the number of opponents, either.
  • The Purity Faction is the most beginner friendly - None are necessarily the best, of course, but Purity’s ability to earn double rewards will really come in handy for newbies.
  • Choose Bolivar or Fielding as your leader - There might be six other leaders to choose from, but these two are the most straightforward and will make the most sense to beginners.
  • Make liberal use of the Advice button - The little “info” button to the far left of the row of icons at the bottom of the screen will be your only friend in learning how to play Starships - aside from this guide, that is. Try to tap it every time you’re ready to take a new action as its suggestions should point you in the right direction.
  • Go out and explore - You won’t have much of a chance at any sort of victory if you don’t leave your home planet. So find those navigation lines that point to new planets, and get to visiting!

Contradiction - Tips, Tricks, and Strategies for the Budding Detective

Posted by Tre Lawrence on February 12th, 2015

Hello to y'all amateur sleuths out there.
We had a heck of a time checking Contradiction out. How much? Check out our review

Contradiction is fun mystery thriller with Kickstarter roots that merges live acting with mobile gaming. The idea is to solve a mystery by catching suspects in a lie.

Here's how to spot the contradictions and get to the bottom of Kate's death.

Gathering Information


  • Magnifying glasses are golden - As you roam around different environments, be on the lookout for the white magnifying glass that might appear at the bottom right; its presence means there's something crucial in that area to check out and/or collect. Not collecting/researching an area when the magnifying glass appears can hold up progress down the line.

  • Ask every possible question - The general premise is to catch suspects lying based on the answers they give during questioning. So ask away! As the game progresses and more data is used to generate even more questions per character, the list gets pretty long. Make sure no question gets skipped over.

  • Roam, then roam some more. And even more - There are many places to visit, and you should get Jenks to revisit places often. New places open up, the environment changes, and new characters make an appearance in areas as he game goes on. Use found items when necessary, and act upon new information. Patience is the name of the game. Use the navigation map to keep track of places that need to be visited again (blue pins versus green).

Top Eleven 2015 - Tips, Tricks, and Strategies for New Managers

Posted by Jennifer Allen on February 11th, 2015

Heads-up, coach:
Still on the fence about downloading this particular soccer/football manager? Check out our Top Eleven 2015 review!

Have you just downloaded Top Eleven 2015 - Be a Soccer Manager and you're not quite sure where to begin? Don’t worry, we’ll guide you through the basics so that you’ve got some idea when it comes to what to do next.

The Basics


  • It should be obvious, but sign in via Facebook. Besides being able to play alongside friends, you’re also safe in the knowledge that none of your progress is going to be lost. And Top Eleven 2015 is a lot more fun when competing with friends.

  • Learn what everything in the menu does. Top Eleven 2015 doesn’t have the easiest of tutorials to follow.

  • Squad is there for setting up formations and tactics, as well as moving players around. Examine each player’s abilities as it highlights where they’re strongest and weakest. Contemplate whether you want to be a more defensive or offensive team, and plan accordingly.

  • Training is where you’ll spend a lot of time. You can pick different training regimes for each of your players and even focus on one in particular (for a price). There’s a choice of three different training methods: match practice is best for honing tactics and boosting team play, cardio is great for general fitness boosts, and stretching reduces the chance of your players picking up injuries.

  • The game’s pretty dependent on time, with Fixtures telling you when your next match is. You get bonuses for being around to watch a match so try to do that whenever possible.

  • Transfers can be reliant on time too, with live auctions running out all the time. This is more something to focus on when you’ve got money spare, though. Early on, just focus on the players you have.

  • You can upgrade your Stadium through the option of the same name. That can lead to more fans, which also means more money. Plus you can upgrade the pitch to reduce the chance of injuries, as well as boost team morale.

Radiation Island - Tips, Tricks, and Strategies to Get You Started and Keep You Alive

Posted by Rob Rich on February 3rd, 2015

Attention all survivors:
Curious to know how much fun we had trying to hunt habits and avoid zombies? Check out our Radiation Island review!

Radiation Island is a survival game, and as such will have two main categories that its players will naturally fall into: those who think it’s too difficult, and those who think it’s too easy. If you belong to the former, we’ve got some handy tips that should make your first few nights a fair bit easier to handle.

The Basics


  • Grab whatever you can - You’re going to need supplies in order to craft tools and weapons, so make sure you grab everything you see laying on the ground when you’re starting out. This will come in handy very quickly.

  • Punch trees - It’s a silly tradition, really, but it’s just as useful here. If you find yourself low on resources and in need of twigs, you can gather them easily by just attacking a tree with nothing equipped.

  • Gather from bushes when you can - Large bushes can also be harvested for useful materials. Later on you’ll probably want to use a machete to make things easier but when you’re just starting out bare hands will work just fine. The materials you gather from these bushes will be necessary to craft medicine, bandages, and so on, so don’t ignore them!

  • Keep a stack of food on you at all times - You’ll start to get hungry pretty fast, and if you don’t have any food handy you’ll begin to starve in short order. You can find coconuts and pineapples scattered around the beach most of the time, so definitely keep as many on hand as you can.

  • Respect the item stacks - Items like food and resources can stack pretty high, so don’t worry about collecting a lot of them. Tools and weapons, on the other hand, do not stack. Keep this in mind when you go out scavenging because inventory space is extremely limited.

  • Craft tools as soon as you can - You’ll want at least one axe and one pick so that you can harvest more wood and stone more reliably than hoping you find some laying around. As a bonus, the axe can help you fend off wolves and other hostiles - it’s better than using your bare hands, at least.

  • Also make sure to craft a boomerang - It’s a silly little weapon, but it’s simple to craft and is also an important item for the beginning of your game. One hit from the boomerang should kill a rabbit (meat!), and it can be used to weaken a wolf at a distance before it closes in and you’ll have to fight it up close.

  • Explore, explore, explore - Keep venturing out to try and find structures to ransack. More often then not you’ll stumble upon items that will aid in crafting more advanced items, or even find better equipment.

  • Establish a home base - Find someplace, preferably a building of some kind as it’s less exposed, and use it as your base of operations. It might take some time to craft things like storage boxes and a bed (assuming one or both aren’t already present), but having a place to come back to when it gets dark and being able to dump all your stuff in a central location is incredibly handy.

Imagination Gone (Delightfully) Amok - Playworld Superheroes Tips, Tricks, and Strategies

Posted by Tre Lawrence on February 2nd, 2015

Hey there, costume innovators.
Want to know if we had fun playing make-believe? Check out our Playworld Superheroes review!

So, the current stock of established superheroes from Marvel and DC don't do it for you? You have an idea for a custom superhero? Then PlayWorld Superheroes is for you. Here's how to get your game going quickly.

Crafting


  • Take time to be creative - Let your imagination do the walking. From the beginning the game underscores an appreciation for self-expression, and it helps to revel in this. From the template of characters, take the time to scroll through all the options because there are quite a few.

  • Make sure to explore - One element the game encourages is exploration. It makes this easy by using dialogue boxes and highlighting to help you along. When an item is found, it can generally be crafted. Again, creativity is the name of the game. There are scissors, crayons, and more, and the best advice is also the most fun advice: just go to town. Use the cut marks to guide the scissors, and be inventive with the crayons. Going all out is especially true of the symbol, because this design gets emblazoned within the game. Do yourself proud.

  • Feel free to rewind - It's also good to know that crafted materials can be redesigned, so there's no need to weep because of an errant crayon swoop.

SimplePlanes - Tips, Tricks, and Strategies to Conquer your Fear of Flying

Posted by Jordan Minor on January 8th, 2015

Hey there, amateur virtual pilots:
Are you wondering whether or not it's worth getting this invested in a plane construction sim in the fist place? Check out our SimplePlanes review!

Building planes in real life is complicated, so it only makes sense that constructing your own flying machines in SimplePlanes is complicated, too. The game does a lot to explain its depth to would-be engineers, but it can still get a little overwhelming. So are here are some simple tips for building better simple planes.

Plane English


Easily the most daunting aspect of creating your first airplane is just figuring out all the vocabulary words. So here’s a little cheat sheet to help you keep them all straight.

Call of Duty: Heroes: Tips, Tricks, and Strategies to be the Finest Hero

Posted by Jennifer Allen on November 25th, 2014

Hello Heroes:
What'd we think of Call of Duty's take on Clash of Clans? Check out our Call of Duty: Heroes review to find out!

Just downloaded Call of Duty: Heroes and need some handy tips and tricks on how to get ahead of the rest? As we often do, we’re here to help you out with getting started.


The Basics


  • Straight away, Oil should be your focus as it all goes towards building new structures.

  • Build mines and oil pumps as much as you’re allowed to, but don’t forget you can gain such resources by taking out enemies.

  • You’re given a protective shield at first, so use that safe time to upgrade and build turrets so you can withstand invasions later on.

  • Buy a second builder as soon as possible so that you can construct two things at once. A third would be handy but will take some focused mission-chasing to achieve for free.

  • Join an alliance as soon as possible. Safety in numbers works here and it’s good to have backup and assistance.

  • Upgrading your Command Center is a wise move. It’ll unlock new structures and units, as well as boost your resource limits.

  • You also unlock new heroes as you increase the Command Center’s level, and they’re the only troops you can directly control.

Reckless Racing 3 - Tips, Tricks, and Strategies for Daring Drifters

Posted by Lee Hamlet on November 20th, 2014

Start your engines:
Would you like to know what we thought of all this drifting and rough racing? Check out our Reckless Racing 3 review!

Reckless Racing 3 is down and dirty racing that prides itself on crazy drifts, breakneck straights, and fantastic in-game physics. Here are few tips to help you to take those corners like a pro.

Start Your Engines


  • Use the straight sections to steal a glance at the mini map towards the top of the screen and check for any fast-approaching sharp turns.

  • It's only on those severe turns that braking becomes necessary. Usually releasing the acceleration while turning into the bend, then hitting the gas and turning out of it will suffice. When using the default button layout, tapping to turn out of a drift is a much better technique than holding down on the directional arrow, ensuring maximum control rather than veering into another drift accidentally. Just be aware that terrain can sometimes dictate otherwise.

  • While the green guideline might be a great tool for rough navigation, deviating slightly wide and then taking corners as close as possible without crashing is a surefire way to overtake and undercut other racers.

  • The reset button isn't as damning as you'd think. In fact, in any situation that requires a reversal maneuver the reset button is actually preferential as it only incurs a minimal time penalty, can serve as an obstruction to opponents, and sometimes players won't even lose their position.

  • Larger, heavier vehicles can use their weight to their advantage by smashing other cars off-course. This is best achieved by hitting the back of an opponent's car during a turn, forcing them into a tailspin. Be sure to judge how this will effect the speed and trajectory of your own car, though.

  • In the settings menu, turn on the Chase Camera to have a clearer view of the road ahead, putting you behind your racer rather than at a fixed bird's eye view. While this new angle may bring on a bit of motion sickness for the weak-stomached (if you had a problem with iOS' home screen animations then you might want to play Zen Garden instead) it grants a better perspective for upcoming turns. For Gymkhana Mode however, the sheer amount of donuts and spins makes the Chase Camera a dizzying nightmare, so it's better to have it saved for Races and Drift events.

Cars: Fast as Lightning - Tips, Tricks, Strategies, and Cheats For an Easy Ride

Posted by Nadia Oxford on October 23rd, 2014

Hey there, Stickers:
Want to know all about how impressed we were with Radiator Springs? Check out our Cars: Fast as Lightning review!

Cars: Fast as Lightning is a cute and fun app that combines racing and town-building with the charisma and marketability of Disney Pixar's Cars franchise. It's a friendly game, but that doesn't mean you can't use a few tips to help you make Radiator Springs shine again.


Starting Out


  • Complete quests to earn rewards - Quests queue up on the left side of the screen when you're not racing. Quests offer rewards like experience and coins, and they're a good way to get back on track if you've been meandering from task to task.
  • Pay attention to the difficulty meter before you race - Each car you engage in a race has a difficulty measuring from one to four. Make sure to race within your rank if you don't want to waste gas on a loss.
  • Place attractions on the track to earn more experience with races - Don't neglect putting attractions on race tracks. They earn you a bit of extra experience with every race, plus they make the joint look classy.

Zombie Highway 2 - Tips, Tricks, Strategies, and Cheats for Surviving the Zombie Apocalypse. For a Bit.

By Lee Hamlet on October 10th, 2014
Hopefully these tips and hints will be enough to help see you that extra mile on the inevitably doomed journey down the aptly-named Zombie Highway.
Read The Full Review »

Six Dos and Don'ts for Taking Care of Your New iPhone 6

Posted by Nadia Oxford on September 25th, 2014

But soft, what light through yonder window breaks? It's the iPhone 6 and the iPhone 6 Plus, both of which hit North America on September 19.

As might be expected by this point, the iPhone 6 is an expensive chunk of technology. You need to talk to it softly, pat it gently, and reassure it as necessary. Here are six tips for taking good care of your new friend.

Also included: Blatant suggestions on what not to do with your phone, regardless of whatever that "fwd: fwd: fwd: READ THIS APPLE FANS!!!" email suggests.


How to Clean your iPhone 6 or 6 Plus


Image Source: LifeProof

DO: Use a soft, dry cloth. Like most open-face electronics, the iPhone 6 collects fingerprints as efficiently as a 12-year-old collects Pokemon.

DON'T: Use a scouring pad. Or a rock. Or your cat's fur. Do not spit on your screen and rub it in your shirt. Do not hand your iPhone to your child, for handing anything to a child is the exact opposite of cleaning it.

How to Charge your iPhone 6 or 6 Plus


DO: Use the provided Lightning cable. Plug it into a USB port, or use the prong extension to plug it into a wall socket. Proceed to twiddle your thumbs for the next hour or so.

DON'T: Use your microwave. Not unless you want to risk killing yourself in an inexplicable quest to own a stinking, molten chunk of plastic, aluminium, and circuitry. Seriously folks, just because a press release is written in Myriad typeface doesn't mean you should do what it says.

How to carry your iPhone 6 or 6 Plus


Image Source: The Mary Sue

DO: Purchase a protective case for your device; preferably an amusing retro tribute that resembles a Game Boy or an NES control pad. Keep your iPhone in a bag or purse pocket that's separate from coins, keys, and gremlins.

DON'T: Stick your iPhone 6 in your back pocket, as aluminum and bum-heat don't mix favorably (the validity of this rumor has yet to be debunked or verified by Snopes, but when is it ever a good idea to keep electronics in your back pocket, anyway? Hint: Never).

How to share your iPhone 6 or 6 Plus


DO: Be generous about letting your friends examine your iPhone 6. Understand their need to do so; touching an object is the most primal way of memorizing its texture, shape, and curves. You should probably stop any attempts to sniff or taste the iPhone, however.

DON'T: Hiss and rear back when your friends reach for your iPhone. Or, if you must do so, at least try and prevent your eyes from flashing yellow and constricting into cat-like slits.

ALSO DON'T: Hand your iPhone 6 to your child. We've already discussed why.

How to eat with your iPhone 6 or 6 Plus


Image Source: MacSkins

DO: Sit your iPhone up at the table, put a bib on it, and offer it a scone.

DON'T: Smear peanut butter between two phones and take a bite.

How to properly show off your iPhone or 6 Plus


DO: Lift up your phone slowly and carefully while humming the "Sunrise" theme from 2001: A Space Odyssey. Before presentation, review your position with the Earth's sun so that its rays may catch and glint off the sexy aluminum backing.

DON'T: Drop the bloody thing.

How to Completely Delete Your iPhone's Contents With iOS 8 Before Trading in for an iPhone 6

Posted by Rob Rich on September 18th, 2014

The iPhone 6 is out tomorrow, and plenty of people are excited about it. So much so that they're planning to - or already have - traded in their old iPhone to go towards it. The thing about trading in hardware is it's very important to make sure your personal information isn't still on there once it leaves your hands. You generally have nothing to worry about when going through reputable businesses, but these days it never hurts to make sure.

Chances are you'll have to wait a bit if you didn't already preorder your iPhone 6, and in the meantime you'll probably be updating to iOS 8. If so, you'll want to know how to clear all the data from your phone with the new iOS before you hand it off for a downpayment.

Guardians on the Go - How to Connect to and Make the Most of the Destiny Companion App

Posted by Rob Rich on September 16th, 2014

At this point I'm relatively certain most of the country is familiar with Destiny. And for those looking to augment their game a bit, Bungie has changed their Bungie Mobile Companion App to Destiny Companion.

Destiny Companion is meant to make it easier for you to monitor things like clan activity and special events from outside the game, and if you've got any Guardians of your own sitting at home it's probably something you should take a look at. But where to start?

How To: Add a Lanyard or Wrist Strap to the iPhone Case

Posted by Jeff Scott on February 19th, 2014

Not so many years ago, every phone came with a built-in loop for attaching a wrist strap. Not so much any more. While there are a few cases that support a lanyard loop, not many still do. And there's the Netsuke from Poddities that adds a loop to the Lightning connector.

A lanyard or wrist strap can be a great feature for safety, especially in high "Apple Picking" crime areas like San Francisco, New York City, or just about any tourist destination worldwide. Not to mention it can help keep a phone from hitting the concrete when pulling it from a pocket.

Here's a quick and easy way to add a simple lanyard to the new iPhone case. I've done this with a few different cases now, and even look for cases to use that fit what is needed to do this. The main feature to look for in a case that this technique will work with is a very sturdy sidewall, made of hard plastic. It needs to be a sturdy build to keep the lanyard from cracking or tearing the case. A soft silicone type case won't work for this.

Choose a lanyard or wrist strap. A variety of them will work. There are probably a couple in the junk drawer left over from an old camera or maybe even an ancient cell phone. Make sure the loop part of the lanyard is at least an inch long to allow space to connect it. If there are none around, I'm a big fan of these from Rokform. Sturdy and just the right size for a wrist strap.

Next, I choose the side - either left or right. Both work. Choose the side that matches the hand the phone is usually held in. I usually hold my phone in my left hand, so I chose left.

Make two small holes about 1/2 inch apart on the side of the case using a 3/32" drill bit. This will leave enough space so that the case left between the holes won't easily break with a little tension. The spacing also needs to be small enough so that the loop part of the lanyard can go from one hole to the other and back.

When drilling, make sure to let the drill do the work; no need to push it through with force. Also, be careful to keep your fingers away from the drill bit and away from the back where the bit will emerge.

Next, loop the lanyard through the holes from the bottom outside through the back of the top hole. If the lanyard string is thicker, something like a paperclip will be needed to push the string through. Slide the lanyard through the loop and then insert the phone and ta-da, a lanyard on your iPhone! Simple and easy.

I have also successfully tried this on the Mophie Juice Pack Air Case, the Olloclip Flip Case, and the official Apple iPhone 5s case. As mentioned above, rubber or silicon cases don't work as they tear easily. If you chose to do this, make sure all common safety rules are followed and it's not our fault if you destroy your case, drill through your hand, or burn down your home.