
Getting started with Pokémon GO: A Guide to the basics
After all kinds of anticipation, Pokémon GO has finally been released on the U.S. and most markets around the world. The first true mobile game from Nintendo, it allows players to live out a fantasy we've all had at one time or another and makes it as close to being a Pokémon Trainer in real life as possible thanks to its augmented reality focus.
And admit, you've definitely wanted to be a Pokémon Trainer at some point in your life.
While Pokémon GO has had some improvements to its early stages since its field test phase, there still might be some questions once you fire it up for the first time and head out to catch 'em all -- or at least the ones in your vicinity. With that in mind, we've put together a short guide to help you get started and understand the basics.
Location, location, location
Pokémon GO transforms parts of your surroundings into in-game elements, and the Pokémon you encounter are affected by your environment, so you definitely want to have the location permissions approved. There's literally no game without that.
It's also a must to play on a phone or tablet with cellular service. Since catching Pokémon requires you to go out and explore, most areas simply won't have sufficient wi-fi service coverage to allow you to get the most out of the game.
Use Google or a Pokémon Trainer Club account to sign in
Having two options to register with the game is nice, and makes it accessible to everyone. Still, if you have a Pokémon Trainer Club account, that's the way you want to go. The account tracks your participation across games throughout the franchise, and it would not be surprising to see some rewards given for other games for playing Pokémon GO at some point.
Turn your camera on
While you will be asked if you are giving Pokémon GO permission to use your device's camera the first time you launch the game, it will prompt you again about the importance of the camera during the tutorial. Part of the "magic" of this title is the augmented reality that layers Pokémon over the real world, and that's not possible without it utilizing your camera. So make like Nike and just do it.
You can turn the AR off with just a tap, but what's the fun in that?
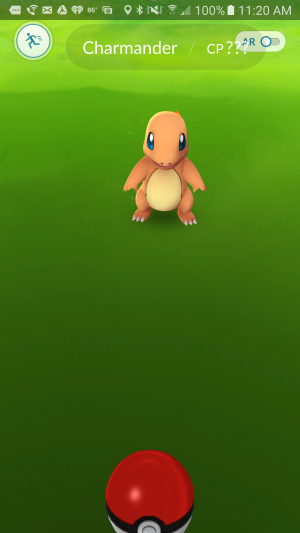
The art of throwing Pokéballs
Considering how important it is to the core gameplay, Pokémon GO doesn't spend much time on instructing you how to actually catch Pokémon. Fortunately, it's pretty simple. You simply flick up from the Pokéball at the bottom of the screen, judging the distance to determine how hard to flick.
It's possible to miss by throwing too short or too long. And even a perfect throw doesn't guarantee you will catch the Pokémon, so you may need several attempts to secure it.
Just like in other Pokémon games, rarer monsters are harder to catch and may require more advanced Pokéballs. However the regular ones you start out with will suffice at the start.
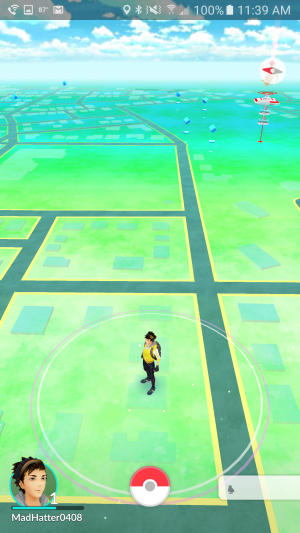
Find a PokéStop near you
Pokémon GO turns landmarks close to your current location into PokéStops, where you can gear up for more advanced adventures. To visit them, you actually need to go to them -- a novel concept, I know.
Though the GPS sensitivity of the game doesn't appear to be the greatest at launch, you only need to be somewhat close to the landmark in question to access the PokéStop. You can drag the map screen and tap on PokéStops (they appear as blue icons with a cube at the top), but after you find them, it's time to go out and explore.
There's much more to learn about Pokémon GO, but these tips should help get you off on the right foot. Best of luck, and remember, Magikarp isn't always found in the water.